
Building cross-platform audio player with .NET

As great as .NET is for writing software for multiple platforms, it lacks some important capabilities. This applies to those functionalities that would work radically differently on different CPUs and operating systems. One of these is the ability to play sound.
With its predecessor, the .NET Framework, you could play sound easily by using classes like SoundPlayer from the standard class library of the framework itself. Likewise, NuGet packages such as NAudio added many extra audio-processing capabilities.
Unfortunately, NAudio is not fully compatible with the cross-platform capabilities of .NET. Although it uses the latest .NET version, it’s still primarily targeted at Windows.
There is, of course, a reliable way to play sound on .NET on any platform, but it requires quite a few additional dependencies. You will have to install ASP.NET Core components even if you don’t need any web development capabilities, and make it interoperate with Node.js, to get this solution to work.
Since there wasn’t any inbuilt way in .NET that would enable you to play audio on Windows, Mac, and Linux, I developed my own NuGet package that enables you to do it. It’s called NetCareAudio. It has now been downloaded more than 140,000 times and has over 100 stars on GitHub.
Today, I will show you how this NuGet package works and how I built it. This will help you understand how audio works on different operating systems and how to build an application that can use features of different operating systems from the same codebase.
Setting up the project structure
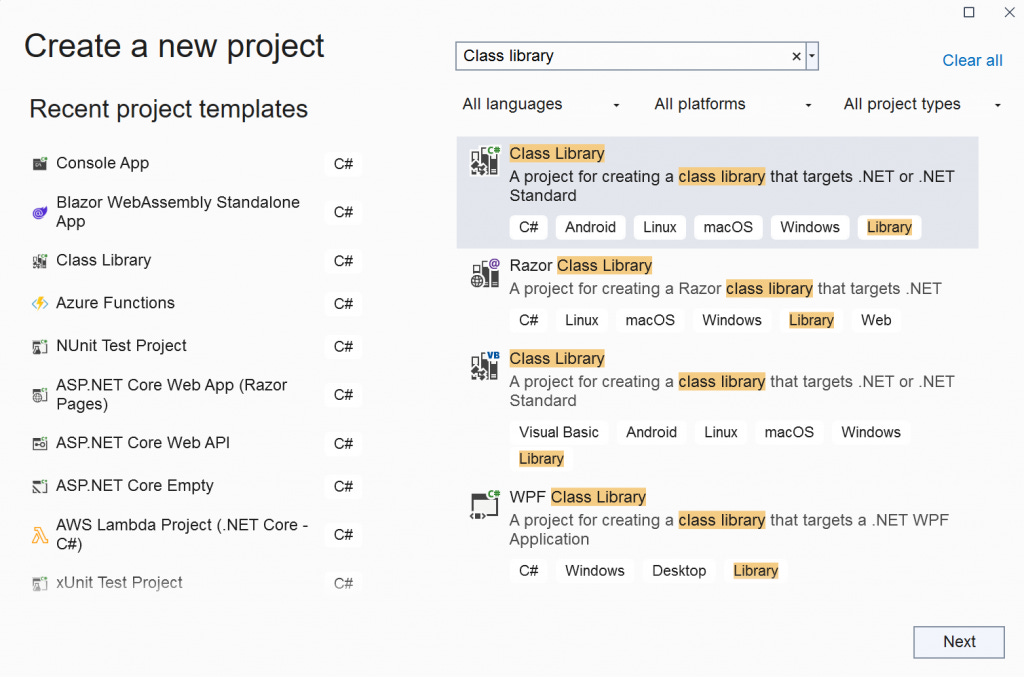
We will want our code to be reusable in other .NET programs. Therefore, the project type that we are building is a standard .NET class library.
Once the project is created, we will need to organize it into an optimal structure for a library with audio playback capabilities. The first thing we will do is create an interface with common audio player methods. As each operating system has a different way of playing audio, there will be one implementation of this interface per OS. Each of those classes will be internal, as the code that will use the library shouldn’t be concerned with which implementation to use. This decision will be handled by the library itself.
The structure of our interface is as follows:
namespace NetCoreAudio.Interfaces;
public interface IPlayer
{
    Task Play(string fileName);
    Task Pause();
    Task Resume();
    Task Stop();
}
Now, we can add the Windows-specific implementation of the interface.
Send commands to MCI on Windows
To play audio on Windows, we will need to use winmm.dll, a native library from the OS, which forms the core part of Windows Multimedia API. The only part of this DLL that we are interested in is the method that can send audio-specific commands to the API. And, to use it, we need to link to the DLL from our code.
This is achieved by the DLLImport attribute, which allows us to create a method in our managed C# code that maps directly to a method within the native DLL that we are linking to. The method we are interested in is mciSendString. And, to use it, we will need to have the following in our class that implements the IPlayer interface mentioned previously:
[DllImport("winmm.dll")]
private static extern long mciSendString(string command, StringBuilder stringReturn, int returnLength, IntPtr hwndCallback);
The method has several parameters that allow us to control the execution of commands and receive the callbacks. However, for demonstration purposes, all commands that we will send to this method will be in a simple “fire and forget” manner. Therefore, except for the command text itself, we will set all other parameters to nulls, zeroes, and null pointers. If you need something more sophisticated, the detailed documentation is available here.
The method that will receive Windows Multimedia API commands and execute them will be as follows:
private void ExecuteMsiCommand(string commandString)
{
    var result = mciSendString(commandString, null, 0, IntPtr.Zero);

    if (result != 0)
    {
        throw new Exception(
            $"Error executing MSI command. Error code: {result}");
    }
}
The mciSendString method invocation inside of it returns 0 if the command has been executed successfully. Any value other than zero is an error code. This is why we are throwing an exception.
Now, on to the commands that need to be sent to the method. The commands defined below are just standard C# strings. Each of these commands is case-insensitive. However, I have used some capital letters for readability.
First, let’s examine a potential implementation of the Play() method of the IPlayer interface. In our example, we will call the ExecuteMsiCommand() method defined earlier three times.
We will be using the same audio device for all of our operations; therefore, before we start the playback, we must close any other media being played by the same device. This can be achieved by sending the following command to ExecuteMsiCommand() function:
Close AllAfter this, we will need to open a media device and give it a reference to a file that we want to play. It will also be given an alias that will be usable in the commands executed afterward. “myDevice” can be any alias of your choice. The “fileName” parameter either represents an absolute path to the audio file in Windows format (e.g. C:\Temp\audio.mp3) or a path relative to the folder where the application resides.
Open {fileName} Type MPEGVideo Alias myDeviceWe assume that an interpolated string is used to insert the fileName parameter into the command, hence the curly brackets.
Next, we will play the file, which is done as follows:
Play myDevicePause and resume commands consist of the corresponding verb followed by the device alias so that it will be Pause myDevice and Resume myDevice respectively. To stop the playback, either Close or Stop command can be used followed by the device alias.
This documentation explains how the device alias works. this reference page contains the full list of the commands that can be used.
The good news is that with the playback type being set to MPEGVideo, the commands sent to the mciSendString method can play MP3 and WAV formats, as well as any other format that can be used by MPEG videos.
Something to look out for
As I have been testing the library, I have discovered that the Open MCI command doesn’t work very well under some scenarios; inside a multi-threaded application is one of them. In those cases, it will return an error code 266, which is normally returned when a correct codec cannot be found on the system. When this happens, the audio device will not be opened; therefore any attempt to execute any other command against the device alias will fail.
However, there is a workaround for that. It is possible to run most MCI commands directly against a file name instead of an alias. So, if the Open command is throwing 266 and you are pulling your hair trying to find out why, you can skip the command and use the following one to start the playback:
Play {fileName}There is one thing to note though. the Close command doesn’t work with the file name. So, if there is no device alias available, you can perform the following command to stop the playback:
Stop {fileName}And follow it up with this command:
Close AllNext, let’s look at how to implement the Linux implementation of the audio player.
Introducing ALSA
Advanced Linux Sound Architecture (ALSA) is a de-facto standard suite of software that enables audio playback on Linux operating systems. Of course, being an open-source OS, there is no 100% guarantee that a particular distribution of Linux will have ALSA. However, all of the mainstream distributions, such as Debian, Ubuntu, and Fedora do. Therefore, if you write any Linux software that specifically relies on ALSA audio playback capabilities, chances are that it will work on the vast majority of Linux machines.
ALSA comes with a handy command line utility called aplay, which is used to play audio from specified files. The utility comes with an intuitive command syntax. For example, to play an MP3 file called “audio.mp3” that is located inside of the currently selected folder, you can use the following command:
aplay audio.mp3Another useful utility that comes with ALSA is amixer. This utility allows you to adjust playback volumes on different hardware devices on any available audio cards. In this context, a device is something that is connected to a particular hardware output. For example, there will be a distinct device used by HDMI output and another device used by a standard audio jack.
To adjust the volume on the first device from the default master device to 75%, you can execute the following command:
amixer sset 'Master' 75%There are many other things that you can do with various ALSA command line utilities, which are beyond the scope of this article. However, one relevant thing is the fact that .NET allows you to execute any arbitrary commands directly from the code, regardless of what OS it’s running on.
Execute Linux shell commands from your code
Remember the IPlayer interface we created earlier? We will now add a Linux implementation of it as a separate class. Let’s call it LinuxPlayer.
Once the class is created with placeholders for the methods, we can add the following private field to it:
private Process _process = null;SystemDiagnostics.Process is an in-built class from the standard library that allows you to start any new processes. In this case, it will enable us to use aplay on Linux. This will be achieved by the following private method:
private Process StartAplayPlayback(string fileName)
{
    var escapedArgs = fileName.Replace("\"", "\\\"");

    var process = new Process()
    {
        StartInfo = new ProcessStartInfo
        {
            FileName = "/bin/bash",
            Arguments = $"-c \"aplay {escapedArgs}\"",
            RedirectStandardOutput = true,
            RedirectStandardInput = true,
            UseShellExecute = false,
            CreateNoWindow = true,
        }
    };
    process.Start();
    return process;
}
I’ll have to explain what are we doing here.
First, we need to escape slashes in our file name. This is so they are actually processed as slash symbols by the process and not as escape characters.
The FileName field of ProcessStartInfo is set to the standard Linux Bash (equivalent of cmd on Windows). This allows us to run any commands that you would normally be able to from a Linux terminal.
The Arguments field consists of the actual aplay command with the file name set as the parameter. Normally, if we would be operating aplay directly from the terminal, we could also add the “i” flag, which allows us to play audio in interactive mode, so we will be able to pause and resume it from the standard input within the process. However, as we are running it from the code, we will achieve these abilities by different means. More on this later.
As we are not using the default shell from the operating system, we are setting the UseShellExecute field to false. We are running the command in a completely headless mode inside of the background process. Therefore we are setting CreateNoWindow field to true.
Finally, to enable us to inject input into the process while it’s running and read the output right from the code, we are setting RedirectStandardOutput and RedirectStandardInput fields to true.
We can now call the StartAplayPlayback() method from the implementation of the Play() method inside the LinuxPlayer class.
Implementation of Stop() method can be done as follows:
public Task Stop()
{
    if (_process != null)
    {
        _process.Kill();
        _process.Dispose();
        _process = null;
    }
    return Task.CompletedTask;
}
This will kill the process, clear out any unmanaged resources used by the Process object, and will set its value to null.
An additional call to the Stop() method can be made from the start of the Play() method. This will stop any current playback before starting a new playback from the beginning.
Finally, we will add the ability to pause and resume the playback. To achieve this on any Unix-based operating system, we can use a parametrized kill command against a unique process id to pause and resume it. This can be applied to virtually any type of process.
The process id that we need is stored inside Id property of the original Process object. This is why we have made it global earlier.
Pausing and resuming a process is performed by -STOP and -CONT parameters respectively. Therefore, our Pause() method will need to create another Process object that uses bash and send the following string to it:
$"kill -STOP {_process.Id}"Likewise, the following string can be used inside of the Resume() method:
$"kill -CONT {_process.Id}"Dynamically choose the IPlayer implementation
The library that we are building should work, regardless of the OS that you would run it on. Therefore, we will need to be able to identify the OS and dynamically apply the correct implementation of the IPlayer interface accordingly.
This is easily achievable in .NET. Assuming that we have called our classes WindowsPlayer and LinuxPlayer and that we have declared a private field of a type IPlayer called _internalPlayer, the following code will apply the correct implementation:
if (RuntimeInformation.IsOSPlatform(OSPlatform.Windows))
    _internalPlayer = new WindowsPlayer();
else if (RuntimeInformation.IsOSPlatform(OSPlatform.Linux))
    _internalPlayer = new LinuxPlayer();
This concludes our Linux implementation. Next, let’s have a look at how to implement the audio player functionality on Mac.
Adding Mac implementation of IPlayer interface
We already have classes called WindowsPlayer and LinuxPlayer which implement the IPlayer interface. Next, we will add a new class and call it MacPlayer.
Once created, we will modify the logic that selects the correct implementation of the IPlayer based on the operating system the application is running on:
if (RuntimeInformation.IsOSPlatform(OSPlatform.Windows))
    _internalPlayer = new WindowsPlayer();
else if (RuntimeInformation.IsOSPlatform(OSPlatform.Linux))
    _internalPlayer = new LinuxPlayer();
else if (RuntimeInformation.IsOSPlatform(OSPlatform.OSX))
    _internalPlayer = new MacPlayer();
Running Bash commands on Mac
The principles of running audio on Mac are similar to how it’s done on Linux. Both of the operating systems are based on Unix; therefore many of their internal components are similar.
Unlike Linux, Mac OS doesn’t use ALSA architecture and therefore it doesn’t come with aplay. However, it comes with a command line utility of its own, known as afplay.
The basic syntax of using afplay is very similar to aplay. Assuming that we have an audio file called “audio.mp3”, we can run the following command to play it:
afplay audio.mp3Just like we did with the Linux implementation, we can launch bash from the Process class and use this command to start the playback. Literally, the only difference here is that we are using “afplay” instead of “aplay”.
Even pausing and resuming the playback is done in the same way. The following string can be used inside of the Pause() method.
$"kill -STOP {_process.Id}"Likewise, the following string can be used inside of the Resume() method:
$"kill -CONT {_process.Id}"As the name of the audio player utility is the only difference between the two player implementations, it would be wise to move most of the code that we have previously written for LinuxPlayer into a shared base class that both LinuxPlayer and MacPlayer will inherit from. We will only need to have a virtual field to store the name of our bash command utility and populate it with either aplay or afplay, depending on which derived class is being used.
Wrapping up
If you want to see how these principles are implemented in practice, you can check the NetCoreAudio repository on GitHub. It is also available in the NuGet Gallery so you can use it in your own .NET Core projects.
If you are interested in learning more about .NET audio functionality, such as controlling that playback volume, recording audio, and integrating this functionality into desktop applications, let me know and I will write more posts about it.
P.S. If you want me to help you improve your software development skills, you can check out my courses and my books. You can also book me for one-on-one mentorship.